In today’s article we will share 8 tips to quickly improve your photography and how you can apply these tips for better photographs.
In today’s modern tech world of industriousness and innovation the majority of us have excellent
mobile cameras at our fingertips. And in this day and age of social media calls for the increasing
demand of not only high quality photos but also high quality content.
Whether you are just a casual person just wanting to improve your photos or your a
hobbyist photographer, these tips will help you improve your photography game.
Just a quick note and something to keep in mind, taking good photos does NOT mean you
have to have an expensive DSLR or Mirrorless camera. A Point N Shoot camera or your mobile
phone camera will do the trick just fine. It’s not about the gear but the mind behind it. Lets get
started.

1. Keep your horizon lines straight

The first thing you can do to make your captures much better is by keeping the horizon line straight when you take a photograph. No one likes to live in a crooked world. Imagine that? It’s very rare when you see professional photographers with a crooked horizon line. With the exception to the rule if it’s a creative element that enhances the photograph.
The photograph on the left is a portrait of the iconic two lovers cliff in Guam. We can see here that the horizon line is very straight. Look where the water meets the sky. This area is a good place to look so you can adjust the horizon.
If you can, try to make the horizon line straight in camera. However sometimes you may be caught up in the moment, perhaps the sunset is so epic you want to capture it quickly or if there is an action happening you snapped the photo, looked at it later and realized the photo is crooked.
Don’t worry, you can fix this in post production. Most mobile phones have basic photo editing software integrated into the gallery. You can fix it there.
Quick Tip: Fix the photo BEFORE you post it on social media.
Photo Caption: Two Lover’s Cliff Guam
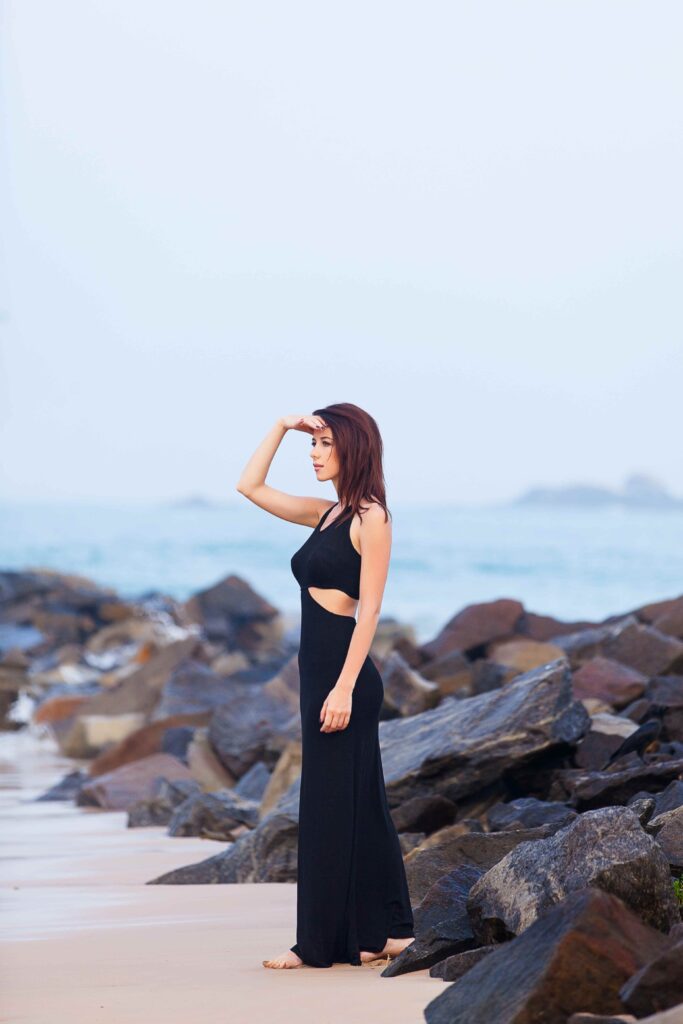
2. Don’t cut off body parts without intention
Nearly all of us either take selfies or photos of others. And of course, we would want our photos of ourselves or of others looking the best we can. That is why it is important that we frame and crop the photos properly.
There is a basic rule in portrait photography that you shouldn’t crop or cut off anyone’s joints in the frame. Reason for that is it would look very unnatural, and the limbs could look bigger. Although there can be exceptions to the rule. Yes, you can have a pleasant cropped picture and you may have seen these photos before. Which we won’t discuss at this time.

Let’s examine the left photo, notice that her feet are cut off, cropped at ankles. The photo seems a bit awkward, and incomplete. It looks like the subject has no feet and could optically make her leg look long. Not very pleasant right?
Now notice the right image. Look how the photo feels complete and professional. It also tells the viewer more information about the subject. Like the shoes or what she is standing on, and even how she is posing. Remember that you can crop in, just remember not to crop at the joints, either before or after.

Want to take better selfies? Check out our best practices for taking selfies article.
3. Observe the Light
In photography, light is a crucial element that lights up the scene or subject. Without light, there will only be darkness. Light also has the power to show depth and dimension. It can also express mood and emotion such as a warm sunset with beautiful warm light or a cold blue night sky.
There are many many types of light, too many to talk about in just this quick tip article. But there are two
that are important that we will talk about. But most importantly, is the ‘direction’ of the light, where its
source is coming from. Combining the types of light along with the direction of light can open up the
possibilities of countless great photographs. We will focus on two types of light that we see on a
regular basis.
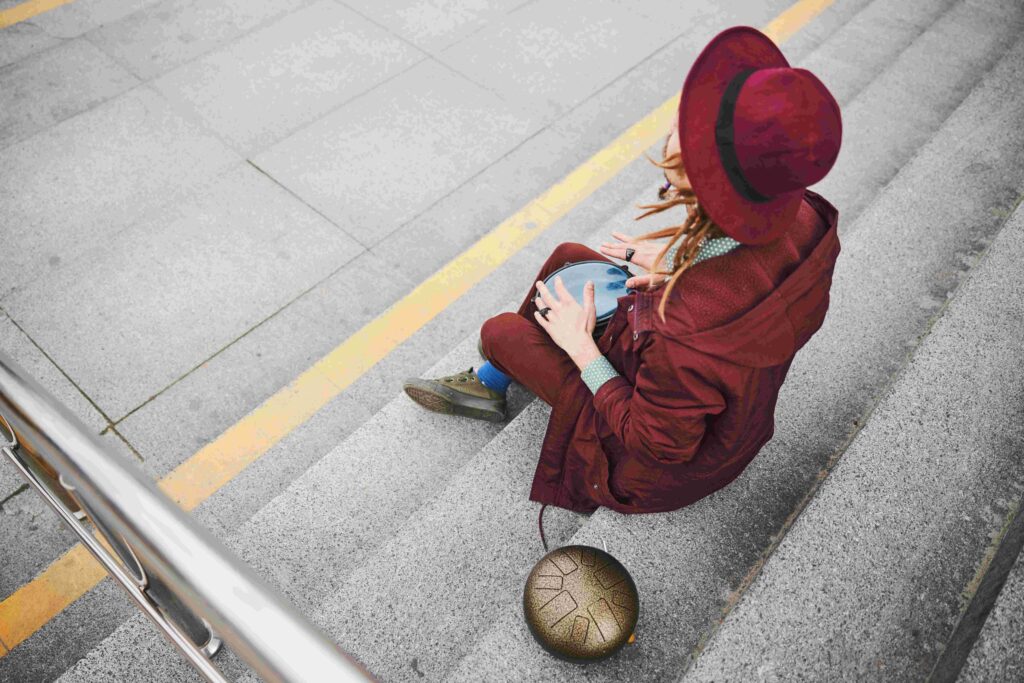
3A. Hard Light

The 1st one is called Hard light. What is hard light? Hard light casts deep defined dark shadows. Hard light usually comes from a small light source in relation to the subject.
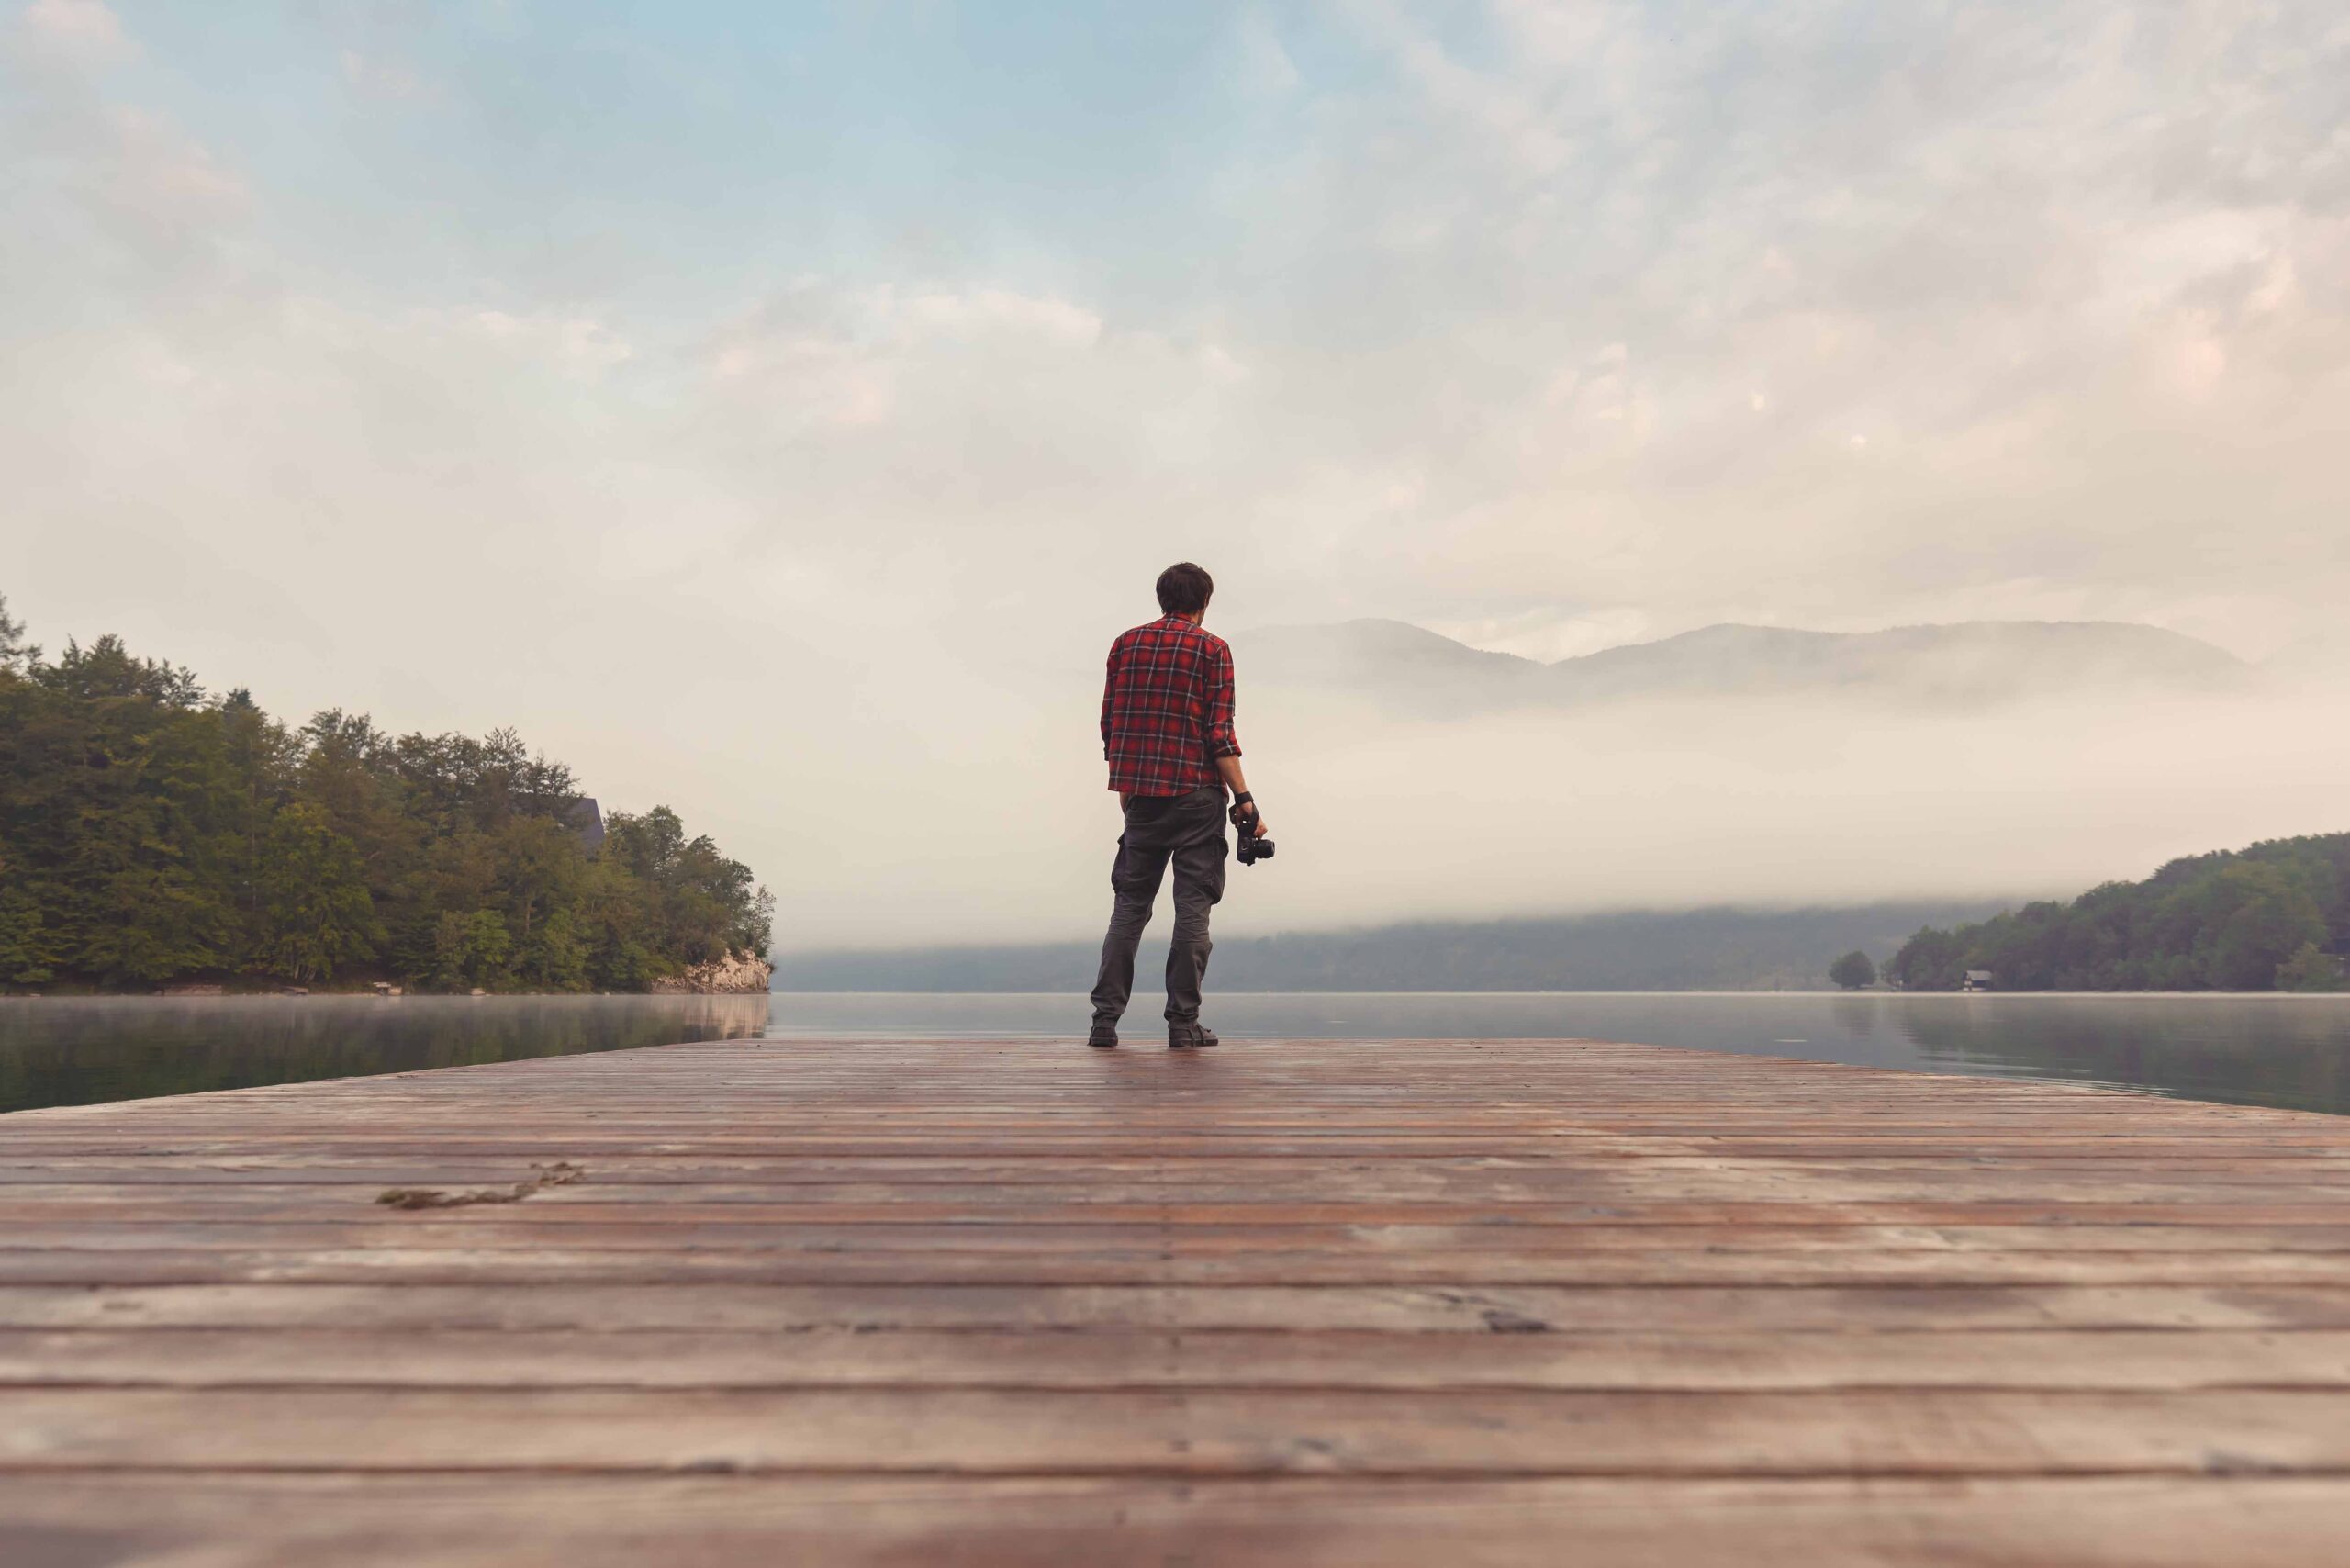
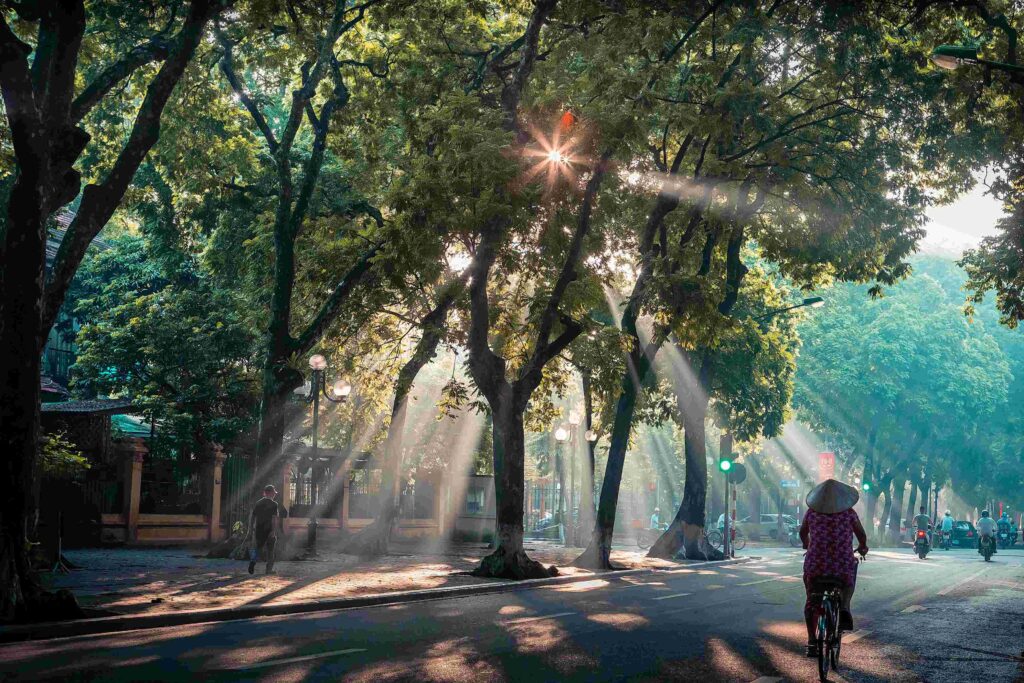
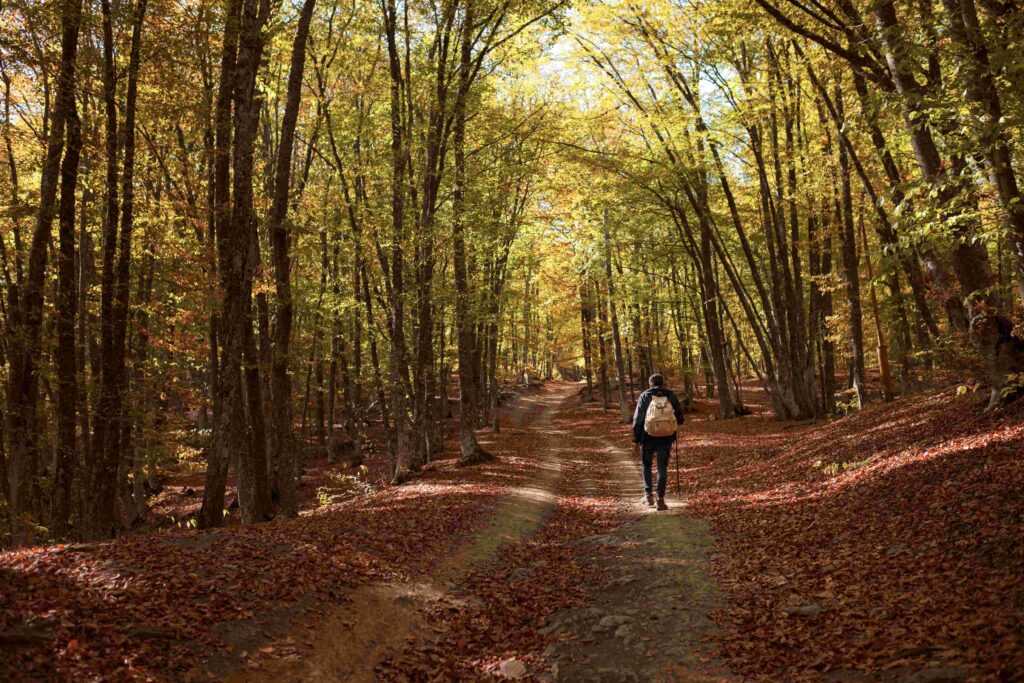
Notice below in both photos that there are harsh shadows. On the left we can clearly see the light pockets and shadows on the road and on the right we can see the shadow from the leaves and hat on the subject. In both photos, the sun is the source of light which is a small light source in relation to the subject.
What does that mean? Yes, the sun is a huge light source but it is very far from us. Thus in the perspective of the photo and subject the light source is small. Which thus creates very harsh shadows
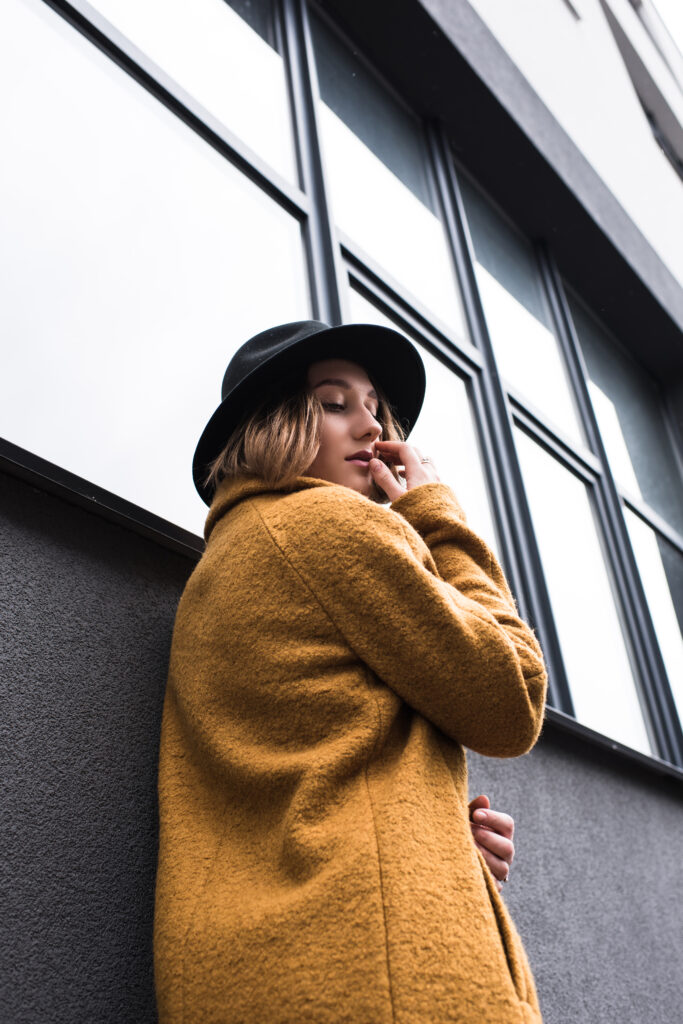
3B. Soft Light
Now that we have an understanding of what hard Light is, understanding what soft light is, is very easy.
So what is soft light? Soft light is light that has almost no harsh shadows. Its very balanced and even type of light. The transition from light to shadow is much more gradual and softer, rather than a definitive line.
Let’s examine the photo bottom left. We can see here a beautiful scene of the dolomites in autumn. The sun is just past those mountains in the back and we can clearly see that there are no harsh shadows in the landscape. Which lights up the scene very evenly. Pleasant feeling isn’t it?
Take a look at the model below. We can see that she has no harsh shadows on her face. Her face and body are evenly lit from top to bottom with no definitive shadows. Remember that every lighting situation is different, and sets a specific mood to the photograph.


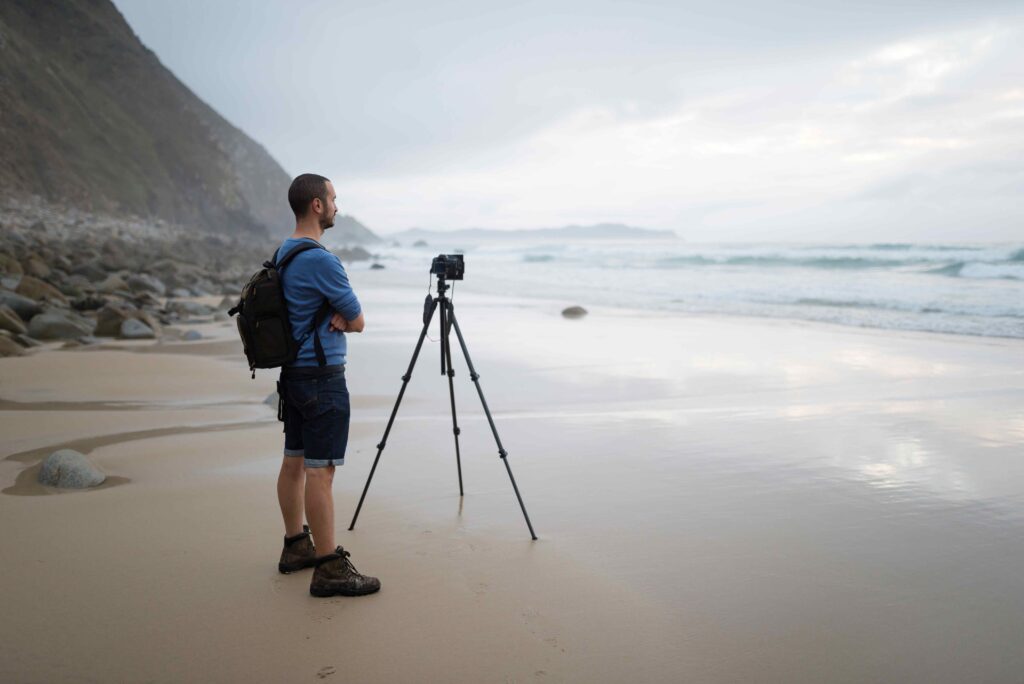
4. Don’t always put your subject in the middle
The natural and most common tendency when photographing something or someone is to put the
subject right smack in the middle. which in a sense isn’t wrong. But there are compositional guidelines
that can help you improve your photography skills.
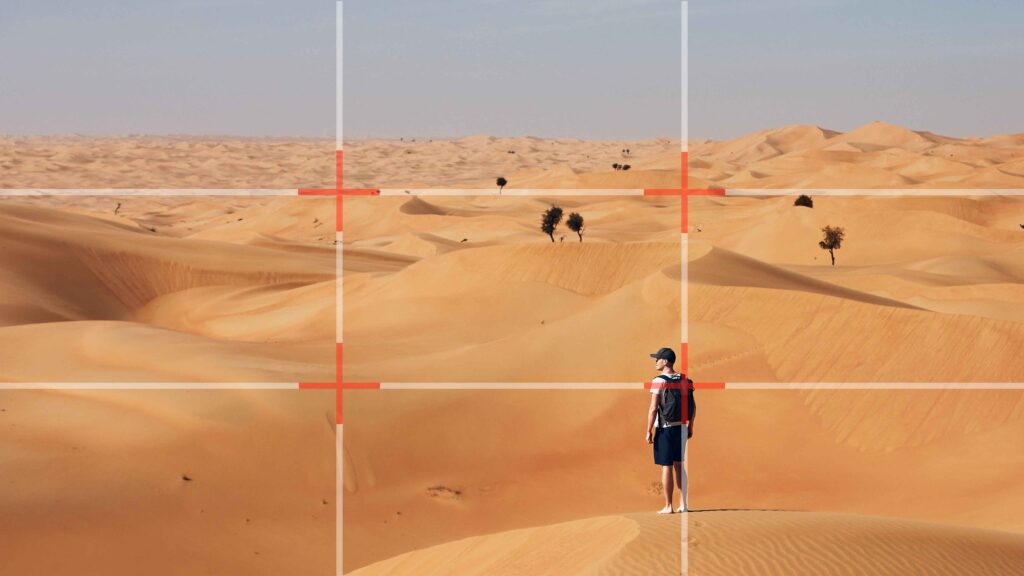
This rule is called “The Rule of Thirds.” What is it exactly? Divide the frame into 3 sections both vertical and horizontal. You can see an example of the rule of thirds in the photo below. Notice the red intersecting lines, that is where you can put your subject to follow this rule.
The photographer here did a great job aligning the horizon line with the top third. Now we just need to put the subject on a intersecting third.

Take a look at the 2nd photo. We aligned the subject with one of the lower intersecting lines. The photo now feels a bit more pleasing, a bit more dramatic, because the subject is looking to the left, therefore putting more space on the left. We also cropped a little off the sky and the foreground for more dramatic effect. Now it looks like a cinematic movie theme. (Que the movie soundtrack =P)
Try to imagine these lines when you are out taking pictures. Your photographs will look so much better
applying this rule. Of course, yes later on once you understand how to use these compositional rules, it can be broken. Other compositional rules defy the rule of thirds, such as symmetrical composition, or leading lines. Keep in mind that photography is ART, so be creative and figure out what works for you.
Are you looking for a camera to take amazing photographs? Don’t know where to start? Look no further we have an article to help beginners with a budget find a great first camera. Check out our article here.
4A. Examples of Rule of Thirds


5. Photograph with Intent
Ask yourself, Why are you taking these photos? Is it to capture a memory? Or is it to show someone something? What are you trying to tell the viewer? Or is an emotion that you felt? Most people take
photos because they would like to preserve that moment they experienced, or a sight they saw.

As a photographer you need to communicate to your viewers by your photographs, what are you trying to tell them? Notice the photo series in this page. We tell a story that this person is making coffee,
how he is making coffee and what type of coffee he made and where it is.
These photos individually won’t be that significant but as a series just like these here, we can tell the complete story.
Photograph key details that add to the story you’re trying to tell.


6. Leave all unnecessary objects out of the frame
Keep all distracting elements, or objects out of the frame. Use your feet to walk past whatever that is distracting, or frame your camera in a way that you can leave out the object or objects so its not in the photograph. Remember you are trying to tell a story to your viewer. Lets take a look at the examples above, all them are good examples.
Now lets imagine the first one with having a sign that says no littering or maybe a trash can. It wouldn’t be flattering would it? Leave that stuff out. Middle photo, imagine some coins in the frame… It wouldn’t add to the story. You get the point. Last photo its just the model, the location and the background. Its all the elements the photo needs to tell a short story or express beauty.


7. Fill the frame
Fill the frame with your subject or subjects. Filling the frame eliminates all types of distractions, its
focuses on the subject. It also keeps the photo simple. Do you know that saying ” Less is More ” ? Yes,
having less in the frame keeps the focus on what your trying to share with the viewers. This
compositional technique is very common not only in photography but also in paintings like the Mona
Lisa, cinematography and more. So don’t be afraid to fill the frame.


Get closer to your subject, use your feet walk closer. If you have a zoom lenses you can use that to
zoom in and fill the frame. Or you can use the digital zoom on your phones/cameras to get closer.
Another way you can fill the frame is by cropping in in post production. Majority of these
professional photos are shot with space around it, so the photographer can crop in for re-composing
and flexibility.
8. Don’t always photograph at eye level
Don’t always shoot from your eye level. Get down low, and shoot upwards. Its gives the photograph
more dramatic effect. The subject seems to be stronger, more tough, or it can portray a sense to height.
Go up and above your subject, shoot downwards. This can give the viewer strength and your subject a sense of vulnerability.


Remember to be Creative
Yes, be creative! Express yourself through photography. Photography is a type of art where artist can express the things they see through their eyes or feel. Whatever photography niche you are into, keep
going at it, keep shooting, keep doing. Its the only way you will get better. Photograph what interests you the most and you will improve your photography drastically.
Enjoy the passion of Photography!