Are you new to lightroom? Have no idea where to start? In this article we will learn how to install Adobe Lightroom Classic Presets on your desktop machine for Windows and Mac computers. If you don’t have Adobe lightroom you may get it at the Adobe Lightroom website. Note though, that this is a paid program and adobe may offer you a free trial for 7 days.
This Tutorial will work on both Mac and Windows so you don’t need to worry what operating system you have.
Lets get started
How to install Adobe Lightroom Classic Presets on Desktop (Lightroom 7.3 or Newer)
1. Download
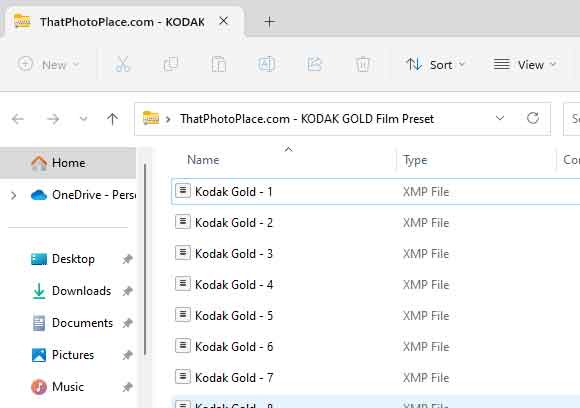
First, download the preset file that you want to install. Presets typically come in the form of a ZIP file. Extract the contents of the ZIP file into a folder. You should see one or more preset files with the file extension .lrtemplate or .xmp.
2. Start up Lightroom
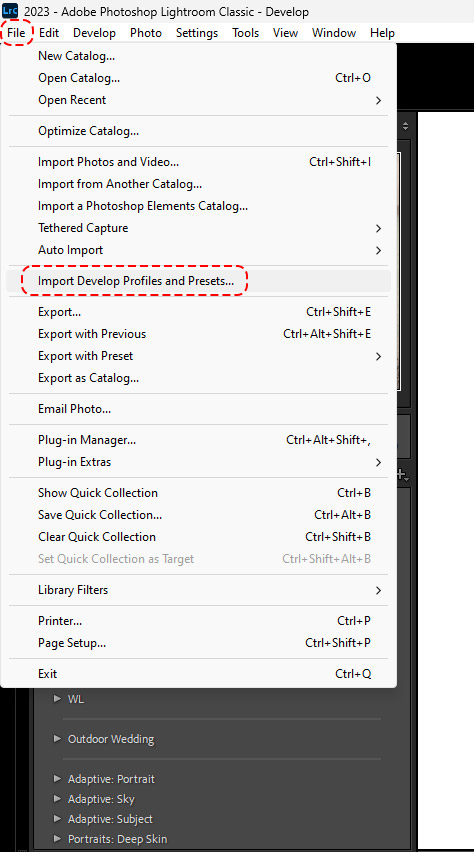
Start Lightroom Classic, navigate to the Develop Module on top left

and click on File – Import and Develop Profiles and Presets in the left main menu.
3. Go to your presets folder
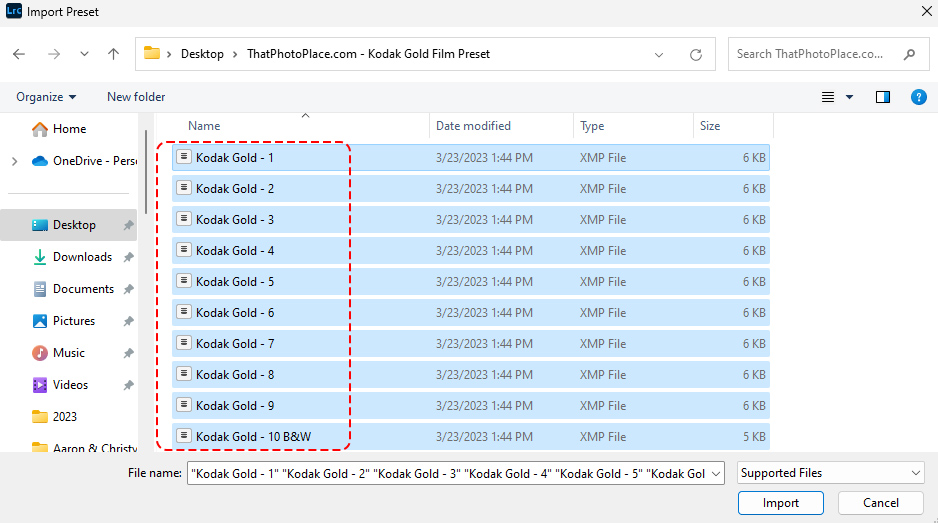
Navigate to the Presets folder you made and pick the zip file.
Nice thing about Lightroom is sometimes you can just import the presets from the zip file, but in this case we extracted it. Sometimes Presets have other files in it which can cause issues with importing.
4. Your Presets are Ready
Now all presets are ready to be used. You may find them in the Presets section on the left side of the develop module as shown below.
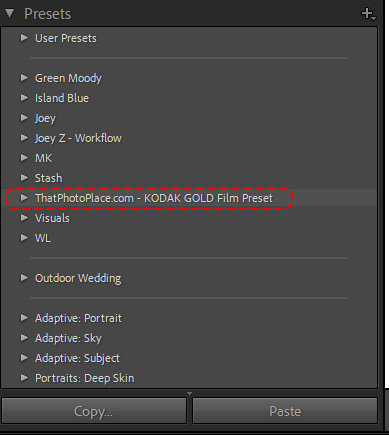
And that’s it!! You got it installed! Great job!
Please Check out our Free Lightroom presets page. Hopefully the presets can help you with your adventure in photography.
How to install Adobe Lightroom Classic Presets Lightroom (7.2 or Older) for Mac and Window
1. Open Lightroom
Go into Lightroom and click on Edit at the top (next to File) on a PC
On Mac Click the Lightroom button on a Mac.
2. Go down to Preferences
Click on preferences and you will see a menu pop up. There will be six tabs at the top, click on Presets (second tab).
3. Click Show Lightroom Presets Folder
Click on Lightroom folder. Next click on Develop Presets Folder
4. Paste Presets into Develop Presets Folder
Copy the contents of the unzipped Presets Folder, found in your download, into the “Develop Presets” folder.
5. Restart Lightroom
Close and restart lightroom, so the software can load your newly installed presets!!
BAM!! You’re Done!!
Something to keep in mind
Keep in mind that these presets are a just starting point to the photo you are editing. A lot of the time, these presets don’t work with a variety photos. Reason why is each photo has different colors, exposures, contrasts, saturation, lighting and much more. Use these presets as a starting point to your look. For example if the image looks dark, you may adjust the Exposure or even tone curve etc., or if the image has too much contrast, adjust the contrast or tone curve accordingly.
Remember to be creative, copying someone else’s work doesn’t make you a great photographer. You can use other’s work for inspiration and therefore use their techniques as an influential aspect of your work. Be original and strive for your unique style.
